
Sunday, September 10, 2017
Life....whew!!
I miss blogging, I miss crafting on a regular basis!!
Almost two years ago I sat in a hospital with my best friend as she was told she had cancer. I will never forget the feeling of total devistation that ran through my mind and body. She was diagnosed with stage 3b cervical cancer. I won't go into details but the next 11 months were so hard for her, for all of us that love her. She lost her battle in November of 2016 . My Husband and I are raising her little boy, he has always been a big part of our lives..now he IS our lives. We have raised 6 kids between us and are basically starting over. He has been with us since October 2016 and we have pretty much gotten a great routine down.
Crafting has always been a big passion for me but I put it on the back burner when Donna was diagnosed. Often when I'd walk into my craft room I'd have such a sadness come over me, she was my crafting partner, my crafting sister and I actually felt lost in my own craft room. Lately though, when I walk into that room I start to feel the familiar excitement and all of the lovely supplies are starting to make me smile again.
Lilman wanted to join football so we signed him up for pee wee and he is loving it. We bought him jerseys , special socks, and an under armor bag that he wanted and I actually cut some htv and put his name and number on them. It felt great!
I realize that my heart is healing and I'm ready to enjoy crafting once again.
It's funny how life works...when my 17 yr old Son was killed in '94 I dove into crafting to keep me sane...this time the thought of crafting made me sad. Go figure!
Thanks for listening.
Michelle


Sunday, April 5, 2015
Diningroom Furniture Make over part 1
Happy Easter Everyone!
A few months ago I decided I wanted to give my Diningroom a facelift. I got my Table done and then had to put it on hold because of my Husband's back surgery and complications. Well he's 99% his old self so I'm getting ready to finish the job :-) Let me start by saying I adore DecoArt Chalky Finish Paint!!! My poor table was a horrible mess, it's 16 yrs old and had taken quite the beating over the yrs. We're retired so buying a whole new set is out of the question. I've been a Decorative Painter and Teacher for over 25 yrs and my all time favorite paints to use for that craft have always been DecoArt, of course I'm going to try out their chalk paint :-) To sum it up, the DecoArt Chalky Finish comes in wonderful colors, it gives excellent coverage, easy to work with and very affordable (especially compared to the overpriced "other" chalk paint). Here is a photo of my Table so far.
.jpg)
.jpg)
.jpg)

Sunday, March 29, 2015
How I make the Steampunk Boxes
Many of you asked for a Tutorial on how I make the Steampunk Boxes, so here you go....
Supplies used:
Eileen Hull Square Box XL Scoreboard Die by Sizzix
Medium weight Chipboard or Matboard
Ranger Glue n Seal
Heavy Cardstock
Tim Holtz Clockworks Gear Embossing folder
DecoArt Chalky Finish Paint or DecoArt Acrylic Paint
Double Sided Tape
Tim Holtz Metal Gears
2 Part Liquid Resin
Plaid Mod Melts Molds
Metallic Rubons
DecoArt Lustre Metallic Waxes
Sharp Craft Knife
High Tac Glue
Embossing/Diecutting machine Vagabond or BigShot
Begin by cutting your chipboard or matboard with the Square Box Die (you will need to cut 2 pieces). Assemble your box, here is a quick video showing how to do it Sizzix Youtube .
.jpg)
.jpg)
.jpg)
.jpg)
Apply a good coat of DecoArt Chalky Finish Carbon Paint
.jpg)
If you don't have the Chalky Finish you can use DecoArt Americana Lamp Black Acrylic Paint. I prefer the Chalky Finish myself.
.jpg)
.jpg)
.jpg)
.jpg)
.jpg)
.jpg)
If you choose to use the Label Hinge that comes with the box, use all of the same steps and once it's dry apply it with the thick tac glue to your box top. Be sure to glue it on leaving a wee bit of space between it and the front of the box. If it's too close, it will be too tight to work with.


Saturday, March 28, 2015
Steampunk Box
One of my newest purchases is the Square Box Die from Sizzix, designed by Eileen Hull. I am SO in love with this Die!! Last week I made a couple of Steampunk boxes and my best Friend fell in love with them so they went home with her. Well her Sister saw the photo of them and wanted one too so I made this one for her last night. I will have a more detailed post tomorrow showing how I made them.


12 Tags of 2015 with Tim Holtz-March
Greetings from Southeast Arkansas where winter is stuck LOL! I'm so thankful for my warm and cozy craft room!
Don't you just love Tim's March Tag? Once again I don't have the exact supplies that Tim used so I improvised. Now normally I make a tag but this month I've made a gift for a very dear Friend.




I really enjoyed making this, at first I felt funny not doing a tag but Tim does encourage us to take inspiration from his and run with it...I ran LOL Thank you for looking. Now I must get this boxed up and mailed off to put a bit of happy in a dear Friend's day.
Don't forget to head to Tim's Blog and join in on the fun!

Saturday, February 28, 2015
12 Tags of 2015 with Tim-February
My goodness I wasn't sure I'd be finished in time! I just love Tim's tag this month (of course I love all of his tags lol), and wanted to get that same romantic white washed feel that he did. I improvised with most of it and have to admit, I'm happy with what I came up with :-)

I used Tim's Seasonal Papers, Grungeboard, Seasonal Stickers, Metal findings and his lovely inkable, scrunchable Ribbon Binding. Add in some Distress Paint, Distress Markers and Clear Rock Candy Distress Glitter and voila! I adore the look of Picket Fence Distress Paint on metal

Be sure to head over to Tim's Blog and join in on the fun!
Tuesday, April 15, 2014
Big Giveaway from The Idea Room!
TheIdeaRoom is giving away a Cricut Explore! Run, don't walk........
TheIdeaRoom big giveaway
Good luck Everyone!
Wednesday, April 9, 2014
Steampunk Canvas Tutorial
I had a few requests for a Tutorial on my Steampunk Canvas. I took a bunch of video, pulled it all together and attempted to upload it here on the blog...no go! Blogger just isn't co-operating. I then tried to upload it to youtube but an hour into uploading it was only at 6%. Soooo, I'm afraid you're going to have to settle for photos and text. Feel free to ask any questions here on the blog and I'll answer them as quick as I can.

Supplies: Canvas (any size), Cheesecloth, Gesso (black and white), Ranger Glue n Seal, Thick Tacky Glue, E6000 glue, Flowers ( I use flowers from I Am Roses, Petaloo and Prima), metal pieces ( I use a lot of the Tim Holtz Idea-ology metals, gears from old watches, springs from old pens and watches, nuts, bolts, the pop tops from soda cans, zipper pulls and any old stuff I find in the garage.) Buttons, laser cut wood shapes, grunge board shapes, and anything else that looks interesting to me. Dylusion Ink Sprays.


Cover your Canvas with a layer of Glue n Seal and let dry.
Arrange your cheesecloth on your canvas and cover with Glue n Seal, let dry.
Start glueing your items all over the canvas...no rhyme or reason, just have fun glueing it all on...you can even stack items if you like how they look together.
Once you have all of your items glued to the canvas, cover the whole thing in a good solid coat of black gesso.
 Once the black gesso is dry, take a scruffy paint brush , dab it into the white gesso and brush it across the canvas..go in all directions brushing lightly in some places and heavy in others.

Once this layer is dry, cover any photos with paper towel and using Dylusion Ink Sprays have fun adding splashes of color all over the canvas.


 If your canvas is a stretched canvas, paint the edges with black gesso. There is no "right" or "wrong" way to do these canvases and they are very forgiving, for instance: you can always add more layers of stuff at any point, even after adding your sprays. Just be sure and do each of the steps again if you do add more.
Supplies: Canvas (any size), Cheesecloth, Gesso (black and white), Ranger Glue n Seal, Thick Tacky Glue, E6000 glue, Flowers ( I use flowers from I Am Roses, Petaloo and Prima), metal pieces ( I use a lot of the Tim Holtz Idea-ology metals, gears from old watches, springs from old pens and watches, nuts, bolts, the pop tops from soda cans, zipper pulls and any old stuff I find in the garage.) Buttons, laser cut wood shapes, grunge board shapes, and anything else that looks interesting to me. Dylusion Ink Sprays.
Cover your Canvas with a layer of Glue n Seal and let dry.
Arrange your cheesecloth on your canvas and cover with Glue n Seal, let dry.
Start glueing your items all over the canvas...no rhyme or reason, just have fun glueing it all on...you can even stack items if you like how they look together.
Once you have all of your items glued to the canvas, cover the whole thing in a good solid coat of black gesso.
Monday, February 24, 2014
12 Tags of 2014 with Tim Holtz-February
I absolutely squeeled when I saw Tim's Tag this month. Is anyone else drooling over that gorgeous stamp?!! It's at the very top of my wish list! I had to improvise again, and I'm really loving my tag :-)
.jpg) Tim used one of my favorite techniques from his CC102 Class, you can see his Tag on his BLOG.
Tim used one of my favorite techniques from his CC102 Class, you can see his Tag on his BLOG.
Thank you for looking :-)
Thank you for looking :-)
Wednesday, January 22, 2014
12 Tags of 2014 with Tim Holtz-January
And we're off to another fun year of Tags! I believe this is one of my most favorite things to do in my craft room...I enjoy the challenge and love the inspiration I get from Tim's Tags. As usual for me I had to do some improvising, but that's part of the fun! Check out Tim's January Tag on his Blog , it's a real beauty!!
I've wanted his Pocket Watch die since he gave us a sneak peek of it, luckily I was able to get it on sale a few weeks ago, and boy was I excited to see he used it for the first Tag of the year! I was happily working on my tag when I killed my Vagabond (see previous post here on my blog), so finishing her up was a bit more of a challenge but I did get her done.


I only have Tim's Seasonal Chit Chat stickers at the moment so chose to use the one that says "Dedication". Have you tried Tim's Stencils out yet? I've got 3 of them so far and LOVE 'EM!!
List of Products I used:
Pumice Stone Distress Ink by Ranger
Black Archival Ink by Ranger
Manilla #8 Tag by Ranger
Black Soot Distress Paint by Ranger
Seasonal Chit Chat Stickers by Tim Holtz
Clockworks Stencil by Tim Holtz
Pocket Watch Frame Die by Tim Holtz
Foil Tape (from my Husband's tool box in the Garage )
Cog Embossing Folder by Spellbinders (My Tim Holtz Clockworks embossing folder is stuck in my dead Vagabond)
Misc. Gears from my stash
Thank you for looking!
Saturday, January 18, 2014
Vagabond Owners...DON'T do what I did!!!
I love , love , LOVE my Vagabond! It is my absolute most favorite tool in my craftroom. If you have one, I'm sure you understand, right? This baby is worth it's weight in gold! Now I thought I was a good Vagabond owner, I use it faithfully, talk sweetly to it, keep it from getting dusty, use wonderful Dies and Embossing Folders in it..yup, yup, thought I was good to my Vagabond. Well I wasn't!
Today I was working on my Tag and ready to emboss some Grungepaper...put my sandwich into the Vagabond, turned it on and heard a funny noise then it stopped. I tried to reverse it and it made a horrible grinding noise. I unplugged it and had a cry..then I got very angry with myself. I foolishly used Cuttlebug cutting plates/mats instead of my Sizzix cutting plates!
How often have I heard Tim tell us in a video to only use Sizzix Accessories? MANY times, did I follow his advice? NO I am madder than a wet Hen...at myself!
.jpg)
.jpg) Please don't use "other" brand accessories with your Vagabond...use the tried and true SIZZIX accessories!! Don't kill your Vagabond!! You can see my sandwich stuck in the machine in the photos above.
Please don't use "other" brand accessories with your Vagabond...use the tried and true SIZZIX accessories!! Don't kill your Vagabond!! You can see my sandwich stuck in the machine in the photos above.
Today I was working on my Tag and ready to emboss some Grungepaper...put my sandwich into the Vagabond, turned it on and heard a funny noise then it stopped. I tried to reverse it and it made a horrible grinding noise. I unplugged it and had a cry..then I got very angry with myself. I foolishly used Cuttlebug cutting plates/mats instead of my Sizzix cutting plates!
How often have I heard Tim tell us in a video to only use Sizzix Accessories? MANY times, did I follow his advice? NO I am madder than a wet Hen...at myself!
Thursday, January 9, 2014
You wanna win a $50.00 crafty shopping spree?!!
That's right, a $50.00 shopping spree from Blitsy! . Blitsy is my favorite online store, they carry tons of the most popular paper crafting brands like Tim Holtz, Ranger, Wendy Vecchi, Spellbinders and more! Not a paper crafter? No problem, they also carry Paints, Brushes, Yarns, Sewing Supplies, and even Kid's Crafts..be sure to check them out...membership is free, prices up to 70% off suggested retail and fast shipping..check it out HERE !!
Blitsy also has fun contests and giveaways, in fact right now you can enter to win a $50.00 shopping spree, woohoooooooooooo! After you sign up for free membership, click on their Blog link and enter away :-)
Good Luck Everyone!
Friday, December 27, 2013
12 Tags of 2013 with Tim Holtz-December
I hope You all had a wonderful Christmas! Our's was very quiet, this year we didn't have any of our Kids or Grands here and I almost didn't even decorate. Tim's December Tag actually got me into the mood to put a tree up and decorate a bit...I'd say his tag was a double inspiration for me this month!
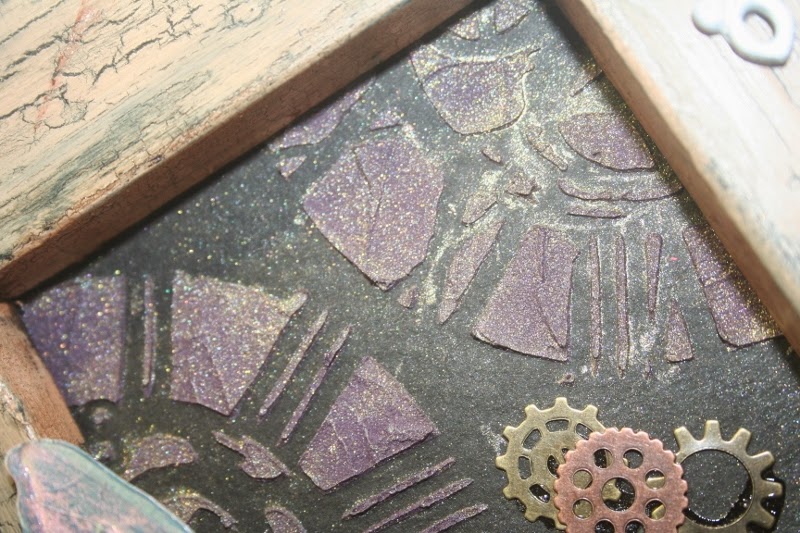
I was anxious to use Tim's "Shatter" Layering Stencil and I love it! I need more practice with the Clearly For Art from Wendy Vecchi..my Poinsettia didn't turn out quite the way I was wanting it to.
I stained my Tag with Iced Spruce Distress Stain, then laid the stencil on top and pounced Picket Fence Distress Paint all over (I just can't stress how much I LOVE these Distress Paints!). Once dry I stamped some of Tim's small snowflake stamps with Salty Ocean and Broken China Distress inks, while the inks were still wet I sprinkled some Sticky Powder on the stamped area, dried it then added some gorgeous Clear Rock Candy Distress Glitter. I stamped the phrase "A Joyful Christmas" using Tim's stamp and Black Archival Ink. I used the movers and shapers Poinsettia and Holly Leaf Dies to cut the white Clearly For Art (I must invest in some of the clear!), I painted the cut shapes with Distress Paints in Bundled Sage and Victorian Velvet. I used Glossy Accents to adhere the poinsettia and holly leaves and finished the tag off with some of Tim's lovely seam binding. I'm thinking this would have made a lovely gift Tag so I hope I remember to make a bunch of them up next year for the gifts.
.jpg) I absolutely love Tim's Tag but I'll need to order some of the Clear CFA , the Frosted Film and the larger Poinsettia Die first. Be sure to check Tim's Blog to see his masterpiece!!!
I absolutely love Tim's Tag but I'll need to order some of the Clear CFA , the Frosted Film and the larger Poinsettia Die first. Be sure to check Tim's Blog to see his masterpiece!!!
Thank you for looking :-)
I was anxious to use Tim's "Shatter" Layering Stencil and I love it! I need more practice with the Clearly For Art from Wendy Vecchi..my Poinsettia didn't turn out quite the way I was wanting it to.
I stained my Tag with Iced Spruce Distress Stain, then laid the stencil on top and pounced Picket Fence Distress Paint all over (I just can't stress how much I LOVE these Distress Paints!). Once dry I stamped some of Tim's small snowflake stamps with Salty Ocean and Broken China Distress inks, while the inks were still wet I sprinkled some Sticky Powder on the stamped area, dried it then added some gorgeous Clear Rock Candy Distress Glitter. I stamped the phrase "A Joyful Christmas" using Tim's stamp and Black Archival Ink. I used the movers and shapers Poinsettia and Holly Leaf Dies to cut the white Clearly For Art (I must invest in some of the clear!), I painted the cut shapes with Distress Paints in Bundled Sage and Victorian Velvet. I used Glossy Accents to adhere the poinsettia and holly leaves and finished the tag off with some of Tim's lovely seam binding. I'm thinking this would have made a lovely gift Tag so I hope I remember to make a bunch of them up next year for the gifts.
.jpg)
Thank you for looking :-)
Thursday, November 14, 2013
12 Tags of 2013 with Tim Holtz-November
I was so thrilled to see Tim's tag this month. I took his CC102 class and this was one of my favorite techniques. Now I don't own the stamp and die set so I had to stamp twice and do some fussy cutting. I still love this technique to bits! You can see Tim's Tag on his blog . Here is my version:
.jpg)
Tim's Tag and Bookplate Die
Tim's Oak Leaf Rubber Stamp
Ranger's Antiquities Frosted Crystal Embossing Powder
Distress Embossing Ink
White Chalk
Thank you for looking!
Thursday, November 7, 2013
SimonSaysStamp Wednesday Challenge-Keep it Simple
I still struggle with Cards but enjoy making them. This week's challenge on the SSS Challenge Blog is "Keep it Simple" ... I'm not sure if I managed to do that or not LOL I worked with 4 ingredients, which are:
1.Paper
2. Distress Inks
3. Tim's Snowman Blueprint Stamp
4. water
I stamped the snowman blueprint image on White Cardstock then lightly colored him in using Distress Inks and Water with Tim's fine detail waterbrush. I then laid a piece of cardstock over the image and inked the edges of the card front with Distress Ink. I admit I wanted to go in and add more color and some embellishments but held myself back ;-) My Best Friend is crazy about Tim (who isn't, right?) and crazy about Snowmen so this card will be going to her.
.jpg)
Thursday, October 17, 2013
12 Tags of 2013 with Tim Holtz-October
Woohooo, Fall is finally here! I was beginning think that it was never coming to the southeast! I love Tim's background technique for his Oct. tag and had fun creating my own. I still haven't got any Distress Glitter so had to improvise there. I can't wait to get my hands on some of that Distress Glitter! For this Tag I used Distress Paints, Distress Ink, Tim's Framed Silhouettes Stamps and Dies, Tim's cool Tinsel and Tim's chit chat stickers. You can see Tim's gorgeous Tags for this month on his Blog.
.jpg)
.jpg)
Saturday, October 12, 2013
Playing with Birdcage CC102 with Tim Holtz Day 5
I couldn't wait to use the Tarnished Birdcage, I added some ribbon that I partially painted with Distress Paint and stamped the word imagine at the bottom.

CC102 with Tim Holtz-Day5 Shabby Chic
I just adore this technique! I've got some ideas for tags, cards and home decor using this one.

CC102 with Tim Holtz-Day 4 Faded Layers
Forgive me for jumping from day to day but I'm just having fun and going with the flow that has taken over me :-) Here's my homework for day 4 Faded Layers:

CC102 with Tim Holtz-Day5 Tarnished Silver
OH boy, here's another technique that I will be using quite often! I love the look!!
 and a little close up:
 If you want to know how to do this, run to OnlineCardClasses and sign up for CC102 with Tim!


Subscribe to:
Posts (Atom)